
Look, society isn’t going to last forever. Whether as a result of war, famine, plague, or just good old fashion economic instability, eventually the orderly system of law and government that we’ve all gotten so used to is going to come crashing down. And unfortunately, when it comes to civilizations, the bigger they are the harder they fall. Just look at Rome. When it came apart, the collapse resulted in a European Dark Age that lasted for about a thousand years.
The point is, when the electricity stops flowing and the postal service grinds to a halt, you’re going to need to be able to protect yourself and your family from whatever comes after the end. I’m not talking about just keeping food storage, learning first aid, or rediscovering the lost science of agriculture; when I say protection, I mean something a bit more weaponized. Feel free to do those other things as well, but make sure that some of your tools can also fend off raiders and wild animals.
So, sit back and enjoy Armageddon, secure in the knowledge that you know how to make…
1. Swords
Although I’m referring to these tools as ‘swords,’ the reality is that I’m actually talking about any sort of cutting implement longer than a kitchen knife. Ideally, your sword should be lightweight, durable, and relatively sharp. I say relatively because in reality, a blade doesn’t need to be overly sharp in order to cut well. The tricky part is finding a workable material to use for the blade. Don’t expect to be forging your weapon Conan-style out of molten ore. The reality is that you’ll need to find something already usable and then convert it. Find some long, thin metal, such as the kind used in traffic signs (there should be lots of those lying around). Use a hammer or other striking tool to bend and fold the metal along a crease until it breaks off. Then simply wrap some cloth, twine, or plastic covered wire around one end to give you a handle. You can sharpen the blade by repeatedly dragging its edge at an angle along any rough, hard surface, but remember, it’s going to take a while before you notice any difference. Alternately, you can make an Aztec style “maquahuitl” by acquiring a long wooden club (a wooden chair leg should suffice), and then carving out deep furrows running down either side. Then find a pane of unbroken glass, and break it. Stick the pieces of shattered glass into the furrows, and you’ll have a nice, sharp weapon with all the cutting power of a metal sword (just hold onto any extra glass you don’t use as the glass that makes up the blade will shatter if overused, and you’ll need to replace it).
2. Slingshot
If you’ve ever seen a slingshot (or even an animated depiction of one) then you probably have a basic idea of how to make one. Start by finding any sort of durable, Y-shaped base. Classically, people have used wooden branches, but if you can find something made of metal (such as the right kind of handle bars from a racing bike), then feel free to go with it. Next, you’ll need something elastic to use for the launcher. Avoid rubber bands—even the large ones—as they have a tendency to break easily when exposed to the elements. Instead, consider using the rubber tube from the inside of a bicycle tire. Cut it into strips, and attach the strips to the forked base by first looping the strip against the base and then wrapping the strip multiple times around the loop and then finally feeding it back through the loop itself (this videoshould help you get a better idea of what I mean). The tension from the rubber should hold the strips in place. Do this twice for each arm of the base, so you have four rubber strips of equal length hanging off of it. Finally, get a piece of durable fabric or leather, cut it into an approximate circle about as big as your fist, and then punch two holes in it on the edges on opposite sides from each other. Then simply tie the ends of the rubber strips around these holes, and you’re all set (just make sure your knot is nice and tight, if it comes undone in mid draw, you could really hurt yourself). For ammunition, use small rocks, metal nuts and bolts, broken glass, or whatever else you happen to find.
3. Throwing spear
This one doesn’t take nearly as much preparation. Just find a long, lightweight handle, such as from a broom or a mop. It can be plastic, wood, or even metal, but keep in mind that you’re going to be hefting and throwing this thing, so try not to use anything too heavy. Then, find something sharp and triangular shaped for the head. Can you use a kitchen knife? Yes. Just make sure that it’s sharp, and weighs enough to counterbalance the handle—so that when it’s thrown, the sharp end always remains facing forward. Attach the end to the handle anyway you can. Duct tape works well, but you’ll have to replace it eventually, especially if you get it wet (such as if you use it for spear fishing). Instead, consider drilling small holes in the head and the handle, and using screws to hold them together. This should make the weapon a bit sturdier, assuming you have the tools.
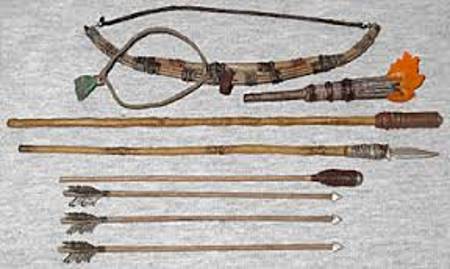
4. Bow and Arrow
The best way to make a bow is with wood. Just find a piece of dry (but still supple) wood with a natural bend to it. Clean off the bark, and you’ve basically got a bow. However, if you don’t have access to any good wood, you can improvise. Consider using a long piece of PVC pipe (but not too long). The right length should allow the PVC to flex, but then quickly return to its proper shape without breaking. Cut notches into each end. Next, find a material for the string. The string shouldn’t be stretchy, because unlike in a slingshot, in a bow the power comes from the base. As such, something like twine or fishing line will work best. Tie or wrap the string around the notches. For arrows, you’ll want to find long, thin, smooth pieces of wood or other lightweight materials. Make sure that they are straight, as curved arrows will be difficult to aim. For the arrowhead, use a piece of broken glass or a small metal blade attached with glue, a small amount of tape, or even some extra wire. If you want your arrow to fly even farther, you’ll need to give it fletching. If you have access to real bird feathers, then use those, otherwise, strips of duct tape or bits of fabric may also work. Just cut them to mimic regular feathers, and attach them to the back end of the arrow (using either glue or wire).
5. Gun
Where do I begin? Actually, giving you detailed instructions on how to make your own gun would be pretty irresponsible of me, considering the volatility of the materials involved. Suffice it to say that you’ll need an ignition source, a firing chamber, and ammunition. Beyond that, you’re on your own. But really, if the apocalypse has actually occurred, then there won’t be anything stopping you from raiding the local gun store. In fact, disregard everything we’ve said here, just go do that. Who needs a crummy slingshot when you could be toting an assault rifle?
Apocalypse, bring it on.

Other useful resources:
Blackout USA (EMP survival and preparedness guide)
Backyard Innovator (All Year Round Source Of Fresh Meat,Vegetables And Clean Drinking Water)
Conquering the coming collapse (Financial advice and preparedness )
Liberty Generator (Easy DIY to build your own off-grid free energy device)
Backyard Liberty (Easy and cheap DIY Aquaponic system to grow your organic and living food bank)
Bullet Proof Home (A Prepper’s Guide in Safeguarding a Home )
Family Self Defense (Best Self Defense Strategies For You And Your Family)
Sold Out After Crisis (Best 37 Items To Hoard For A Long Term Crisis)
By Lee Flynn
Source: survivetheapocalypse.net