
I try to collect pine resin deposits that happen naturally, usually caused by a fracture in a limb by a storm, lightning, or animals scratching on the bark. I also gather resin that oozes naturally out of the broken knots in the pine tree.
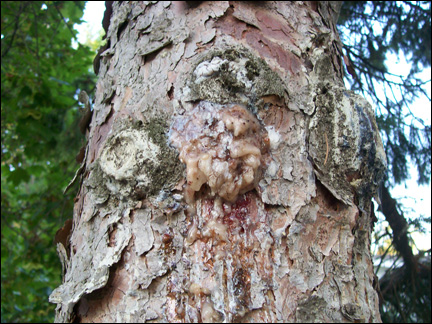
The runny clear resin, the dried up clumps of amber or the flakey white drips, dried from seasons past, are all good resin for making pine pitch.Usually I collect my resin in some sort of metal container, such as a soup can or a little larger can with some pre-punched holes in the bottom of the can. The holes are about the size of a common finish nail and covers the bottom randomly.
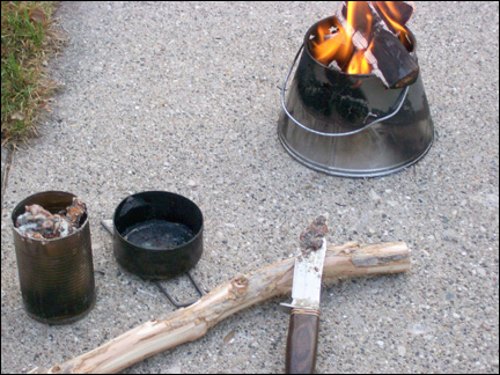
When I get the can, with the pre-punched holes, filled up almost to the top with resin, I take it home. I use a standard tuna can for the melting and semi-straining process. The soup can, with the pre-punched holes that contain the resin globules, will fit inside the tuna can. This acts as a double boiler. Place the tuna can, with the soup can inside, on top of a fire. Pre-heat the resin before you start.
The resin is very volatile. If not careful, the resin will ignite into a 6 foot flame.Take the set-up over to a heat source, like a grill, camp stove, or campfire and heat it up.
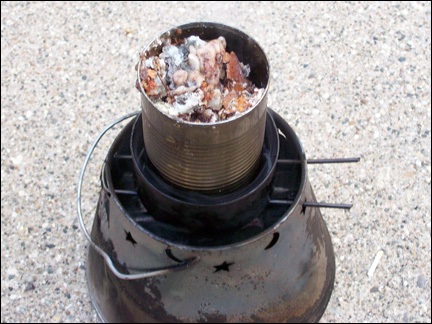
The resin will start to smoke heavily, but do not be alarmed. Carefully take a stick and push the bark and sediment slowly down to the bottom of the soup can. Push the pine resin out of the straining holes into the tuna can.When you have managed to squeeze out all of the resin out of the bundle of bark and other debris, take the set-up off of the heat source and slowly remove the soup can from the tuna can. The cans will be hot to the touch. Use something, like a pair of metal tongs, to lift the cans. Be sure that you do this slowly, as you do not want to waste any of the hot, liquid resin still draining from the soup can.
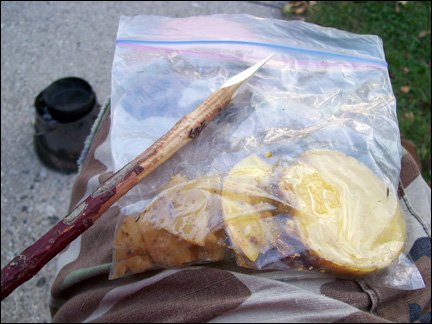
Take the tuna can back to the heat source and warm up the resin to a liquid state. Stir the resin with a stick as it liquefies. Remove the tuna can from the heat source and pour the hot resin into a clean tuna can 1/3 of the way full.
Next, add a “filler material” to the tuna can of resin. You can use dung from any herbivore. I like using rabbit droppings that are so dry that they turn to dust when you work them into the pitch. You can also use hardwood ash, bone dust, sawdust, animal hair, or dried up stems from hearty plant stalks. The “filler material” is something that the resin will bind to and help further strengthen the pitch.
There is really no secret formula for pine pitch. Trial and error is how I came about a “consistently” good recipe. Tutoring from some Native American friends also helped me out tremendously.
For now, we will just say that for 1/3 of a tuna can full of resin, we will add 2 pinches of “filler material”.
The last ingredient to add is fat, tallow, or beeswax. This is an additive to keep the final product workable without getting too brittle when in it’s dry state. The amount of the “flexible” ingredient will vary from person to person, depending on their particular need for the pine pitch.
Take the tuna can to the heat source again and SLOWLY stir everything together with a stick. I like to use a hardwood twig about the diameter of a pencil and sharpened at one end. This helps to get in the corner of the tuna can when mixing and becomes a “slow match” when you apply the pitch.
After the resin, wax, and filler are mixed well, take the tuna can away from the heat source. Thoroughly mix the ingredients until you get it to the consistency of a good, thick tar. You will notice it will start to harden quite fast. Take a small “gob” and and ball it up on the pointy end of a stick. Lick one of your palms a couple of times or moisten your palm with water (this keeps the hot pitch from sticking to your hands. Be sure the pitch is not so hot that it burns your hands!) and knead the ball into an oblong shape as it hardens. I try to make sure it’s uniform around the stick and the small pointy end of the sharpened twig sticks out.
Light the sharpened end in a fire. Take it out of the fire and it will stay lit. The lighted end will slowly heat up small amounts of pitch for use. If you need more, you just tilt the pitch stick at an angle over the lighted fire and more pitch will melt free. The sharp point will help you direct the pitch to whatever you are working on.
Source: primitiveways.com
Other useful resources:
Survival MD (Best Post SHTF Medical Survival Guide Ever)
Blackout USA (EMP survival and preparedness guide)
Backyard Innovator (All Year Round Source Of Fresh Meat,Vegetables And Clean Drinking Water)
Conquering the coming collapse (Financial advice and preparedness )
Liberty Generator (Easy DIY to build your own off-grid free energy device)
Backyard Liberty (Easy and cheap DIY Aquaponic system to grow your organic and living food bank)
Bullet Proof Home (A Prepper’s Guide in Safeguarding a Home )
Family Self Defense (Best Self Defense Strategies For You And Your Family)
Sold Out After Crisis (Best 37 Items To Hoard For A Long Term Crisis)
Because one can never be prepared enough.