
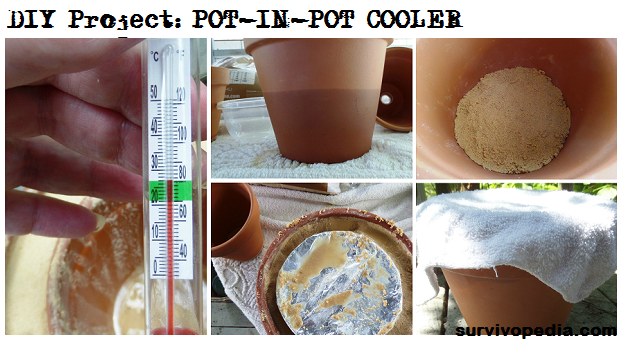
As temperatures warm up, there is a natural tendency to look for ways to keep outdoor lunches cool, or even store other items without spending a fortune on ice and plastic chests. The flower pot cooler is easy to build, easy to use, and will never wear out.
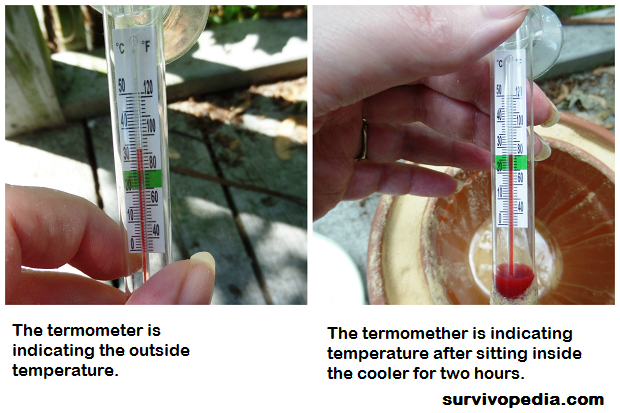
When placed in a sunny location, it will produce a minimum of 10 degrees reduction in temperature, and as much as 30 degrees lower on a hot, dry day. With the addition of a fan, this device can produce even lower temperatures that will enable you to store perishable items.
How and Why it Works
The flower pot cooler uses an inner terra cotta pot surrounded by sand and an outer terra cotta pot. As water evaporates from the sand, it leaches into the outer pot more than the inner one, thus creating a wicking action.
As humidity is pulled from the sand and the inner pot, the temperature inside the inner pot cools down.
Overall, the cooler the inner pot is in relation to the outer temperature, the faster the water will evaporate. This also tends to lead to accelerated cooling across time instead of simple steady decline in temperature. Interestingly enough, this type of evaporation is similar to the way refrigerators and air conditioners work.
The only difference is they use higher temperatures, motorized fans, and other materials to create a cooling effect.
Tools and Parts:
 Required Tools: small cup or laddle for sand
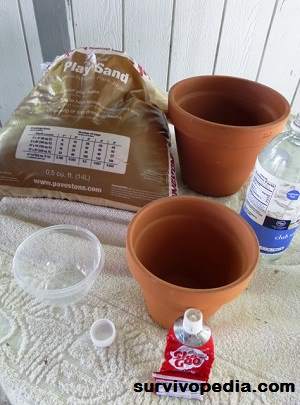
Required Parts:
- 1 – 8“ unglazed terra cotta flower pot (approx $3.50)
- 1 – 6“ unglazed terra cotta flower pot (approx $2.50)
- Approx 3 – 4 pounds of sand (approx 4.00 for 20+ pounds)
- 1 quart of water (less than $1.00)
- 2 bottle caps or something else waterproof to cover holes in bottom of terra cotta pots (less than $1.00)
- Shoe Goo or other water proof glue that can bind clay to plastic (approx $3.00 to $5.00 depending on brand and tube size)
- Saucer or plate to cover inner pot ($1.00 or less)
- White towel to cover plate ($1.00 or less)
Building the Flower Pot Cooler
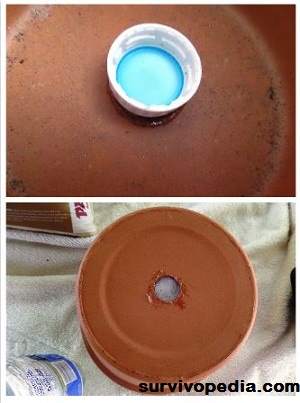 Step 1: Use one bottle cap and sealer to glue the cap to the inside bottom of the 8“ flower pot. The cap should cover the hole in the bottom, and have enough glue/sealant to create a full ring around the cap.
Turn the flower pot upside down and add additional sealant to completely fill the hole. This will help prevent leaks.
Repeat the same procedure with a second bottle cap for the 6“ flower pot. Let both pots dry a minimum of 24 hours before proceeding to the next step.
Step 2: Place enough sand in the bottom of the 8“ flower pot so that the lip of the 6“ flower pot is even with the 8“ flower pot.
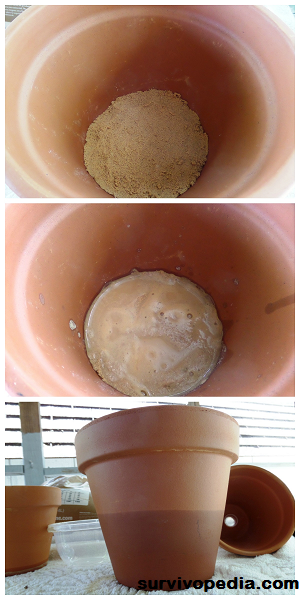
Step 3: Once you have enough sand packed into the 8“ flower pot, add water to the sand. You will see some bubbles as air is pushed out of the sand.
Let the flower pot sit for a few hours and check for leaks.
Water will begin seeping into the pots and turn them a darker color.
When operating the flower pot cooler, it should start with the darker color so that you know enough water is in place for effective evaporation.
Step 4: After the water has had a chance to disburse through the sand, place the 6“ flower pot inside the 8“ one.
Cover the inner pot with a saucer or tin foil so that sand and water cannot get into the inner chamber.
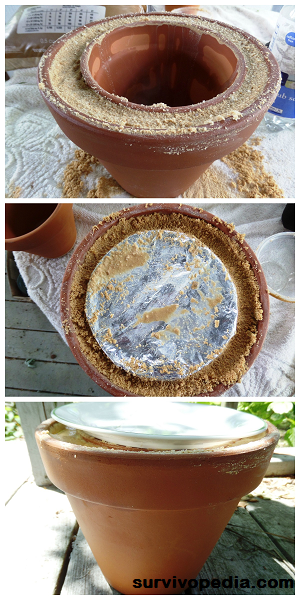 Step 5: Add sand to the area between the two pots, and then add water to push the sand down.
Once you reach the top, leave approximately one inch below the top of the pots so that you have a small channel for adding water later on.
If built correctly, you will not need to disassemble the cooler to stir up the sand or make it more permeable to the water.
Operating the Flower Pot Cooler
You can use the flower pot cooler as long as the sand is moist. Simply place whatever needs to be kept cool in a water proof bag and then put that in the 6“ flower pot.
Next, cover the inner flower pot with a saucer, and then place a white towel on top of that.
White will deflect heat, and thus keep the inner chamber a bit cooler without preventing the sides of the outer flower part from being exposed to as much heat as possible.
Notes for Future Development
Here are some ideas that may make your flower pot cooler more effective, and also enable you to transform the basic concepts into a permanent outdoor cooler that harnesses solar power for cooling.
- Try using an ice cube inside the inner chamber of the flower pot cooler because it will create a difference between internal and external temperatures faster. I do not recommend using cool water to moisten the sand because that will slow down evaporation rates; however warm water might accelerate the process.
- Use two wooden boxes and sand between them, or sponges for holding the water. Other highly porous materials might also work for building larger, permanent outdoor coolers
- When using a fan with the flower pot cooler, do not aim the fan into the pots, instead let the air hit the sides of the pot. While it is possible to build a cooling system with a fan aimed into a bucket, clay or wooden walls will not allow the air to diffuse effectively. In addition, the cool air will be blown out of the inner pot, which results in the loss of a cooling chamber.
Find out more about becoming self-sufficient in Conquering the Coming Collapse.
Source: survivopedia.com
One Reply to “DIY Project: The Easiest Off-grid Fridge”