
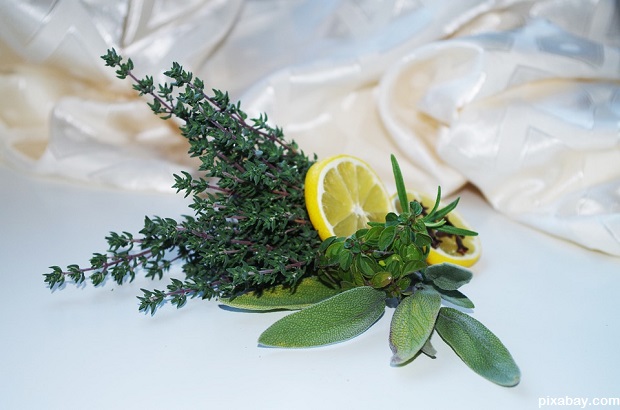
There are many ways to use herbs and they’re easy to grow even if you live in a small apartment because they’re small enough to pose as house plants.
A bonus is that they’re fragrant, pretty, and easy to take care of. They’re great to use fresh to season food, but they’re medicinal too.
In a SHTF situation, having these ingredients will be good for bartering as well, because everyone will need them for medicinal purposes or just as a luxury.
Our ancestors used these plants well for medical purposes, and you need to know how to prepare them too. Some recipes will call for them to be used straight up or dried, but many call for teas, tinctures, poultices, infusions, decoctions, sprouting, or powders so you need to learn how to properly make those, too.
Read this great article about growing herbs indoors to see where to start from, then follow the steps below to see how to turn any of them them into natural remedies.
How To Dry Your Ingredients
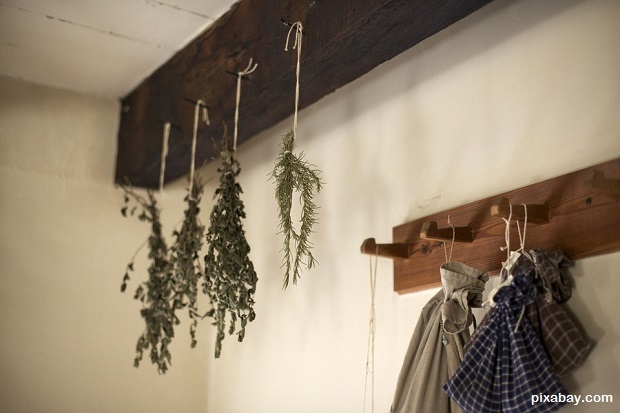
First things first. In order to use your ingredients, you can dry them and there are a few different ways to do this. Drying is a great way to store them long-term, though most of them lose their efficacy and flavor slowly over time.
Simply harvest your ingredients and let them dry in a warm, dry spot out of the sun, or in the dehydrator or oven. Regardless of which method you choose, make sure that they’re in a single layer so that they dry evenly. If layered, they may mold before they dry, especially if you’re drying them naturally.
Wash them off to remove any dust or bugs. If you’re drying them naturally cover them with a paper towel to keep them clean while they’re drying. Let them dry completely until they crumble because moisture will cause them to mold. If you’re using the oven, do so at about 200 degrees or so.
You want them to dry but not burn, and you don’t want to cook them because you want to preserve the natural goodness in them, not bake them all out.
Once you’ve dried them, you need to store them in an air-tight container. If you won’t be using them within a few months, you can always vacuum seal them to extend storage time.
If you choose to dry the entire plant, you can dry it using the same methods as above or you can hang them upside down in a warm, dry spot out of the sun. You can also dry citrus rinds. They’re rich in vitamin C and add a nice flavor. Just grate the zest off and dry as stated above.
In addition to leaves, you can use the berries, roots, bark, seeds, stems and flowers of many plants too, using the same methods. It just depends on what the recipe, or your personal preference, calls for.
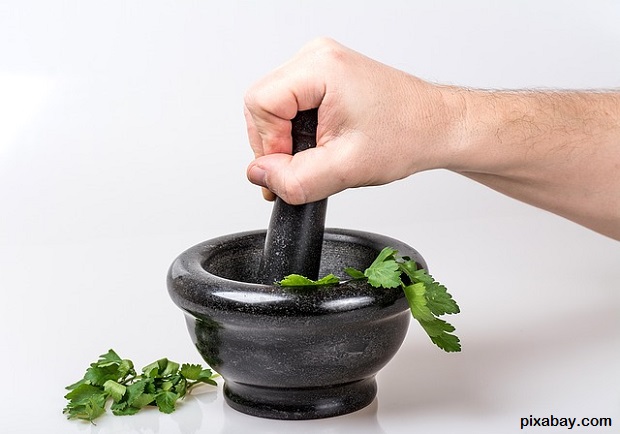
To take drying a step further, you may want to powder it. Simply grind the herb into a fine powder either by hand or using a coffee grinder.
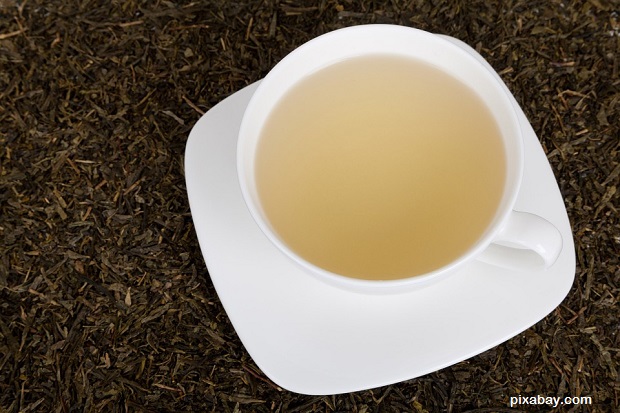
How To Make Tea From Herbs
Unless you’ve lived in a cave with no human interaction whatsoever, you’ve heard of tea. Teas, also called infusions, are made from the softer parts of plants such as leaves, flowers, or rinds. Sometimes seed and roots will be used in teas instead of decoctions because boiling will damage the essential oils in some plants. If you’re using seeds or roots, it’s best to crush them a bit in order to release the beneficial oils inside.
You can make tea from either fresh or dried ingredients and many of them are delicious as well as good for you. Teas are great for everything from personal pleasure to curing ailments and they’re quick and simple to make.
You can combine different ingredients for different flavor profiles or purposes, too. Play with them, and figure out which flavors you like best. If using them medicinally, do some research. I’ve written articles about that here and here.
You can put your ingredients in a tea ball or cheesecloth or you can place them directly in the water, then strain it. You can also drink them hot or cold. If the tea is medicinal and not particularly delicious, you can add a bit of honey or citrus rind as long as the recipe doesn’t specifically tell you not to.
A good rule of thumb is to use about 1 tsp. of powdered ingredients or 2 tsp. per cup of tea if you’re using dried. Double that if you’re using fresh ingredients. If you’re using them just for pleasure, you can adjust the amount to suit your taste. If you’re making a medicinal tea, you may use up to 1/2 cup of ingredients per cup, depending upon the recipe.
Start with boiling water, then put your ingredients in to steep, or put them in the cup and pour the hot water over them. Cover and let them steep for 10-20 minutes, then strain if necessary. Many medicinal tea or infusion recipes will call for longer steeping in order to infuse more of the plant benefits into the water. Enjoy!

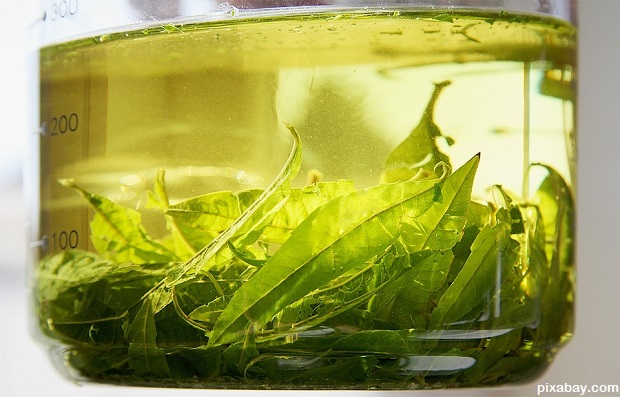
How To Make A Decoction
Decoctions are similar to teas except they’re made with harder parts of plants, such as roots, seeds, barks, and stems. The primary difference in preparation is that you boil the ingredients in the water in order to release the medicinal aspects.
Bring your water to a boil and add the ingredients. It’s best to crush the ingredients a bit to release the oils and other benefits. Cover and reduce heat to a slow simmer. If you’re using smaller pieces, simmer for about 20 minutes. If using larger chunks, simmer for up to an hour, depending on what the recipe calls for. When it’s finished steeping, strain the herbs out and it’s finished.
The reason that you want to cover the decoction while it’s simmering is that you want to essential oils to drip back down into the decoction. A rule of thumb for amounts is a little over 1 tablespoon of dried ingredients per cup of decoction. If you’d like a stronger decoction, use more herbs, boil it longer, or let in steep overnight depending upon what the recipe calls for.
How To Make A Tincture
Tinctures are made when an ingredient isn’t particularly soluble in water or when you want to store it longer. The process uses alcohol in the form of vodka or rum (which needs to be at least 80 proof, or 40 percent alcohol), or 90-180 proof grain alcohol.

You’ll need dark colored bottles with tight-fitting corks or lids because sunlight damages the medicinal value of the tincture. If you don’t have dark bottles, your tincture needs to be stored in a dark place.
Making a tincture is a simple process but it’s important that you use the proper amounts of alcohol and dried plants. The ratio should be 1 part plant material to 4 parts liquid. To make it easier, use 2 ounces of plant material for every 8 ounces (1 cup) liquid. It’s important that you measure the plants by weight, not volume because 1 tablespoon of dried basil will obviously be much larger in volume that 1 tablespoon of bark.
The percentage of alcohol is important as well, to ensure that you get a tincture with at least a 1-year shelf life. The liquid needs to be around 40 percent alcohol, which means that if you use 80 or 90 proof rum or vodka, you can use it as-is, but if you use grain alcohol (180 proof), use 1/2 cup alcohol and 1/2 cup distilled water.
Add the ingredients to your bottles and make sure that the cork or lid is tight. Store in a dark area. Shake once daily until the tincture is ready. If you’re using soft material such as leaves or powder, the process takes about 2 weeks. Harder matter such as bark or woody stalks will take a bit longer: about a month.
At the end of the processing time, strain the mixture through a strainer or cheese cloth to remove the solid matter, pressing on the plant matter (wringing if you’re using a cheese cloth) to get all the liquid out. If you used powder, stop shaking the tincture 3 days before it’s done. The powder will settle to the bottom and you can just pour the liquid off the top through a cheese cloth.
Pour the liquid into a clean glass (again, preferably dark) container and seal well. Store in a dark place at room temp. Since you’re using a large percentage of plant matter to liquid, and the alcohol better releases the properties of the plant, dosages of tincture tend to be much less than that of teas or decoctions.
Dosage does, of course, depend upon the recipe but the average dose of tincture is usually 1-2ml (30-60 drops) two or three times per day. You can take it directly in your mouth to absorb it faster or you can mix it in a few ounces of juice or water. If, for various reasons, you don’t want the alcohol, add the tincture to a couple ounces of very hot and the alcohol will evaporate in a couple of minutes.
Macerations
These are by far the easiest to prepare and are used for tender or fresh plants, or for material whose beneficial properties would be damaged using heat or alcohol. You simply soak the matter in water overnight and drink the water according to the directions in the recipe.
Poultices
These are super simple because the crushed herbs are either placed directly on the wound, or between two pieces of cheese cloth or bandage, then placed on the wound. You may need to add just enough water to dampen the herbs.
Then wrap the treated wound with a light cotton bandage to keep the poultice on the wound. You can even use a large leaf to hold the poultice if necessary.
Compresses
Compresses are just clothes that have been soaked in infusions, decoctions or tinctures. They’re placed on the wound and are often used in place of a poultice.
Now that you know a bit more about the different methods to prepare herbal recipes for survival, practice a bit. You wouldn’t want to use it for the first time ever in a life or death situation!
If you have any experience with using these herbal concoctions, or would like to share some great recipes, please do so in the comments section below.
Saving our forefathers ways starts with people like you and me actually relearning these skills and putting them to use to live better lives through good times and bad. Our answers on these lost skills comes straight from the source, from old forgotten classic books written by past generations, and from first hand witness accounts from the past few hundred years. Aside from a precious few who have gone out of their way to learn basic survival skills, most of us today would be utterly hopeless if we were plopped in the middle of a forest or jungle and suddenly forced to fend for ourselves using only the resources around us. In short, our forefathers lived more simply than most people today are willing to live and that is why they survived with no grocery store, no cheap oil, no cars, no electricity, and no running water. Just like our forefathers used to do, The Lost Ways teaches you how you can survive in the worst-case scenario with the minimum resources available. It comes as a step-by-step guide accompanied by pictures and teaches you how to use basic ingredients to make super-food for your loved ones.
Source: survivopedia.com
About Theresa Crouse
Theresa Crouse is a full-time writer currently living in central Florida. She was born and raised in the hills of West Virginia, where she learned to farm, hunt, fish, and live off the land from an early age. She prefers to live off the grid as much as possible and does her best to follow the “leave nothing behind but footprints” philosophy. For fun, she enjoys shooting, kayaking, tinkering on her car and motorcycle, and just about anything else that involves water, going fast, or the outdoors. You can send Theresa a message at editor [at] survivopedia.com.

great site here on BIOPREPPER! all the answers ya lookin for!