Although there are many different forms an indoor hydroponic system can take, they all operate essentially the same way and have the same potential benefits and problems.
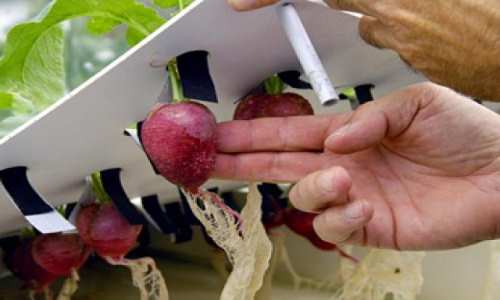
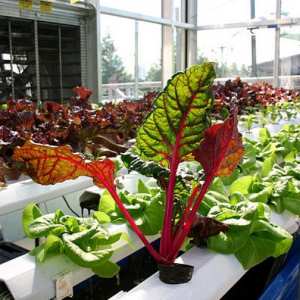
The form you end up with will depend on how much and what kind of room you have, the kind of lighting available, the supplies and tools you have, how much you want to spend, and how patient you are with DIY projects. Because the basic hydroponic operation is the same, once you understand it you can create any adaptations you want to improve upon the basic design.
Benefits to Growing a Vegetable Garden Hydroponically
Here are some of the benefits of using a hydroponic system to grow plants:
- Food plants are healthier and taste better.
- Flowers and herbs have a more vibrant color and scent.
- All plants grow faster and bigger, e.g. the same variety of tomato plant grown in soil is only 1/3 the size of one grown hydroponically, even when the seeds come from the same packet.
- If grown indoors and kept clean, there are few issues with pests and disease.
There can be problems too, but most of those are with improper setup. I’ve included a section near the end that describes some of them.
Building an Indoor Hydroponic Gardening System
Whether you build a system yourself or buy a kit, in general these are the parts you will need, along with plants and maintenance supplies.
- A reservoir for the liquid (water/nutrient) medium
- An aquarium-type water pump and hose for circulation
- An aquarium aerator stone
- LED grow-lights for the dark side of the window
- Some kind of structure for holding pots
- Opaque containers for plant roots (needs to be dark inside to prevent algae growth)
I looked through a number of systems on YouTube to find one that would be of average ease to build and still work for the inside of a house or apartment – one that was vertical to take up the least amount of space, but still have lots of plants. The following video shows the windowfarm I liked best. There are lots of steps, but it’s doable, and the supplies are easy to find and cheap enough to buy. Most people with carpentry tools can handle this project.
After the video I’ve listed detailed directions, so you can print them out to follow, after you’ve seen how it all works. Although the video shows a vertical garden built to go outside, if you add grow lights you can use it inside as well.
If you are interested in growing your own food then click here to find out more about this awesome guide on food independence.
Hydroponic Indoor Garden Setup
If you watched the video, you will have noticed that this system uses PVC piping, a plastic fence post, and a bucket to build the window farm.
- The PVC piping is cut into holders for the plants.
- The fence post holds the plant holders vertical, while water drips down the inside (protected from insects) to water the roots.
- The bucket holds and stabilizes the fence post, and is also where you aerate and fertilize the water.
The table below shows the materials and tools you’ll need to build this system. The instructions start from the bottom up: How to prepare the bucket first, then the post with pot holders, then the water distribution tray on top.
Hydroponic System Equipment & Supplies
Start by gathering all your construction materials and tools together. Look to see what you have first, then what you can borrow, then buy the rest. The plant supplies can wait till later, if you like.
|
Materials
|
Equipment/Tools
|
Plant Supplies
|
|---|---|---|
|
4 ft. of 3″ PVC pipe
|
Compound or hack saw
|
20-22 plants of your choice
|
|
6 ft. of 5″ vinyl fence post (hollow)
|
Jig saw
|
25 each 3″ net pots
|
|
Flat 5″ vinyl cap (for post) & 5″ decorative cap
|
Saw angle block (jig)
|
Liquid fertilizer*
|
|
5 gallon bucket with lid
|
2 mini-clamps
|
Water pH test kit
|
|
1/2″ slip to thread fitting
|
Caulking gun
|
Plant grow light
|
|
1/2″ female thread to bar fitting
|
Drill & bits
|
Mellow music for growth
|
|
5″ inspection port (like for boats)
|
Pencil & measuring tape
|
|
|
Submersible water pump
|
Electric fan (optional)
|
|
|
Silicone caulk
|
||
|
6 ft. of 3/8″ plastic tubing
|
||
|
3/8″ grommet
|
||
|
PVC vinyl fence cement (glue)
|
* Fertilizer can be liquid fish fertilizer or an organic liquid fertilizer of your choice. If you want really healthy plants, you’ll want to avoid chemical fertilizers.
Instructions: Prepare the Water Bucket & Lid
- Draw a 5.25″ square on the bucket lid. Drill 1/4″ holes inside the corners of the square. Starting at one hole,
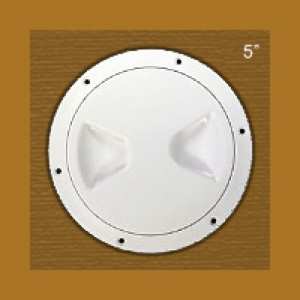
Inspection port bottom fits into round hole cut in bucket lid. Port lid screws in and keeps it airtight. cut the square out with a jigsaw. The post will fit in here.
- Next to it, cut a 5″ round hole. Glue the inspection port bottom into the hole. Screw in the cap.
- Cut a 1/2″ notch in the rim of the bucket for a pump cord.
- Beneath the bucket carry hold, drill a 1/2″ hole and insert a grommet (for airstone).
- Insert the post into the bucket to see where the lid goes on the post. Take it out again with the lid attached to the post. This will help you position the holes for plant holders.
Cut Out the Plant Holders
These are the holders that your net pots will fit into. You’ll need the 3″ drain pipe, the saw jig, and a clamp.
- Cut the 3″ sewer drain pipe into several 4″ pieces.
- Insert one 4″ piece into the saw jig. Place a clamp in front to hold it still.
- Saw through the pipe at jig angle to make two slanted standoffs (holders).
- Repeat with all 4″ pipe pieces. You should end up with about 24 standoffs.
Prepare Post for Plant Holders
- Saw off 4″ of post end. This will be used for the top later.
- About 4″ away from new end of fence post (opposite bucket lid), start drawing positions for each standoff. There will be six on each side. Divide/mark a post side into equal sections about 9″ each. Do the same on the opposite side.
- On one of the unmarked sides, start about 8″ away from the top end and mark five or six sections. Do the same on its opposite side. This staggers positions on each side.
- Place the oval edge of a standoff in one of the sections with long edge down. Draw around the edge.
- Remove the standoff and move it down to the next section. Draw another outline and so on, until you have filled each section.
- Turn the post over and do the same thing with all three other sides.
- Now you’re going to cut them out. Drill four 1/4″ holes inside the edge of each outline. Use the holes to cut out each oval with the jigsaw.
- On the bottom of the post, beyond the bucket lid, cut a large notch out of one of the sides (about 6″x3.5″) to accommodate the water pump inside the bucket.
Install the Plant Holders
- Using PVC vinyl fence cement (or epoxy), glue standoffs into the oval holes on one side of the fence post. Imagine the post standing. The round edge of each standoff should be facing up. Let the glue dry – approx. 10 minutes.
- Turn the post to another side and repeat, letting the standoffs dry before turning to the next side. Finish the other two sides the same way. Let them all dry.
- Using the caulking gun, caulk around the outside of each standoff where it meets the post (to make it waterproof). Repeat on the other three sides.
- Turn the fan on and let all of it “cure” for a few hours (or overnight).
Prepare the Water Sprinkler Cap
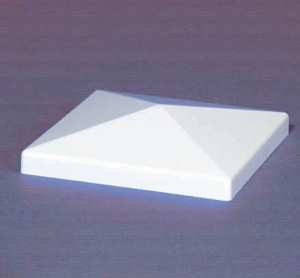
The sprinkler cap will be a two piece structure that includes a bottom tray and a decorative cap. Only part of this next procedure is shown in the video. First gather the 4″ post piece you cut off, the “flat” vinyl cap (it’s actually a slight pyramid shape), both fittings you bought, the water hose, your drill, and a pencil.
- Place the flat cap on your workspace so the pyramid part is on top (as though it were sitting on the post). Center the post piece on the cap and draw around the edges to mark its position. Set it aside.
- At the pyramid tip, drill a 1/2″ hole.
- Now drill about 15 each of 1/4″ holes, spaced evenly across the cap, inside of the square you marked.
- Find your post piece and glue it in place on its square. Let it dry. Caulk the outside edges to make it waterproof. You now have a tray.
- Through the center hole, screw your 1/2″ slip-to-thread fitting on the top side of the tray into the 1/2″ female thread-to-bar fitting on the bottom side of the tray.
- Push one end of your water hose into the fitting on the bottom. The fitting should automatically grip the hose. If it doesn’t you might have to glue it in.
This is where the water goes – pumped up through the hose and the fittings, spilling over the top into the tray, and dripping down through the holes.
Assemble Your New Indoor Vegetable Garden

Now let’s assemble the whole thing. In addition to what you’ve put together so far, here is what you will need for this step: Water pump, decorative cap, and water. You might need a rubber mat and small ladder or stepstool also.
- Position the bucket inside the house near a window. To protect the rug or floor, place a rubber lined mat underneath.
- Place the pump in the bucket with the electrical wire fitting into the notch on the bucket rim.
- If you use one, place the aerator stone in the bucket. Pass the hose through the grommet and attach it to your electrical supply.
- Stand the post up close to the bucket. Place the tray on top, with the hose running down through the post.
- Fill the bucket 3/4 of the way with water.
- Lift up the post and insert into the bucket. Attach the water hose to the pump. Clamp down the lid, but open the port, so you can see what’s going in the bucket. The post should stand up straight.
- Plug the pump into your electrical outlet (or power strip). Turn the pump on and check the water flow to make sure it’s going up through the hose and coming out of the fitting on top.
- Plug in the aerator, if you’re using one.
- Check to make sure everything is working right. Check the top tray and every standoff to make sure nothing is leaking.
- Then put the decorative cap on top and you’re ready for plants.
Insert Plants Into the Hydroponic Tower
For plants you can choose ferns, herbs, vegetables, fruits (like strawberries or tomatoes), or marijuana in some states. This step is the most fun. You will need plants, net holders, fertilizer, and grow lights.
- Pull plants out of their grow pots. Wash the roots bare.
- Immediately insert plants in a net holder. Place the holder in one of the post standoffs.
- Keep going until as many standoffs are full as you want.
- Add liquid fertilizer to the water in the bucket, according to manufacturer’s instructions.
- Turn on the pump and let the water flow.
- Mount your grow lights so they shine most strongly on the front side of the post away from the window.
Potential Problems With Hydroponic
Most of the problems incurred with hydroponic systems can be prevented by the way the system is set up. Here are some:
- Clogged pipe – Keep the bucket covered where water collects. Make sure your pump has a filter and keep the filter clean. Also arrange the water channel so there are no sharp bends that could kink.
- Insects – Keep the plants fertilized so they stay healthy. Insects are attracted to weak and sick plants. Keep the upper tray covered too, so there’s no place to breed.
- Weak light – Nearly all plants, especially herbs, need plenty of light. Windows don’t provide enough, so be sure to supplement with plant grow lights.
- Plants drying out – Make sure water is getting to all your containers. You may have to poke another hole or two in the top tray on whichever side isn’t getting enough.
Most likely your system will not be perfect the first time you set it up, but if you have chosen this system to use, and have followed directions as carefully as possible, the resulting problems should be minimal. Resolving them will give you greater skills and more insight into what your plants need. Let the issues that arise and the plants, themselves, trigger your imagination to bigger and better ideas.
Source : dengarden.com
About the author :
My real name is Susette Horspool and my other pseudonym on this site is Sustainable Sue. I have a Masters Degree in international business with a focus on natural resources, and an avocation of natural healing. I have worked in water conservation, organizational development, and teaching. I’ve been a Peace Corps volunteer twice and have lived in four different countries.
WHAT TO READ NEXT :
- NATURAL WEED CONTROL FOR A HEALTHY GARDEN
- 8 GRAINS YOU CAN GROW IN YOUR OWN GARDEN
- HOW TO USE YOUR INDOOR VERMI-COMPOSTER
- HOW TO GROW POTATOES: EASY POTATO GROWING METHODS FOR ALL SITUATIONS
- HOW TO GROW TOMATOES ANYWHERE, EVEN IN THE LOW DESERT
- PREPPERS AND BIG AGRICULTURE: WHAT YOU DON’T KNOW ABOUT FOOD PREPAREDNESS!


I’ve been considering doing this for a while now. nice write up. It definitely gives me something to think about.
Thank you for linking to my site and giving me proper credit for this article. There are too many would-be writers these days who copy articles like mine and blatantly claim it for themselves. You are helping to keep up the integrity of the Internet.