Venison is a very healthy meat for your consumption. It is leaner although it is considered a red meat. Another great thing about venison is that often it is free, if you hunt it yourself.
Which is what I’m going to go over with you. If you have ever considered hunting, then you probably also need to be aware of how to properly butcher a deer.
Thankfully, it is a pretty easy and quick process once you get the hang of it. Plus, you can process the deer into many different kinds of meat. Deer is one of our main meat sources throughout the year.
So knowing how to hunt and process a deer are vital in a homesteading lifestyle. Here is how you process a deer:
Tools Needed:
- Hunting knife
- Boom Pole
- Tractor
- Gambrel
- A large cooler
- 5-pound bag of ice
13 Steps to Butcher a Deer:
1. Hang up the Deer
RELATED : 5 TECHNIQUES TO PRESERVE MEAT IN THE WILD YOU SHOULD PRACTICE
So you wake up early in the morning and head out to go bring home meat for your family. Thankfully on this day you got lucky and got a great deer. (If you are unfamiliar with hunting, here is an awesome resource to get you started.)
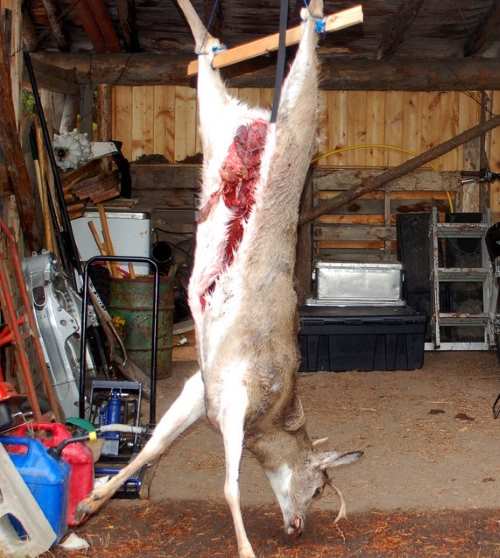
But now what? Well, you have to begin by getting your materials ready. You’ll need to sharpen your knife, pull your cooler out, and you need a way to hang a deer. We have a tractor so we attach a boon pole to it and away we go.
However, you can use a gambrel and meat hanging system. It is just about what you have to work with and what you feel most comfortable with.
Once you have your tools ready, you’ll need to poke a hole in the deer. It will be below the knee and between the shin and tendon. Do this on both sides. That way you have a little hook area to slide the boom pole or gambrel through to hold the deer in place.
Then you’ll need to raise the deer up high. That way nothing drags on the ground and it makes the whole process much easier.
2. Start Cutting at the Hip Flap
There is a piece of skin between the hip and the stomach. We always cut this first as it is a good starting point.
So you’ll run the knife down the side of the deer all the way to the shoulder. This will get you to where you can begin to process the front quarter of the deer. Once you’ve completed this part of the process, you are ready to move on to the next step.
3. Handle the First Front Shoulder
Once you have cut up to the front shoulder, you’ll need to cut the front shoulder away from the body. The idea is to detach the area you are working with from the body as much as possible as it makes it easier to maneuver the piece of meat.
Once you’ve got this piece of meat exposed, you are ready to move on to removing the hooves of the deer.
4. Break the Hoof Off
RELATED : HOW TO MAKE YOUR OWN BEEF JERKY STEP-BY STEP
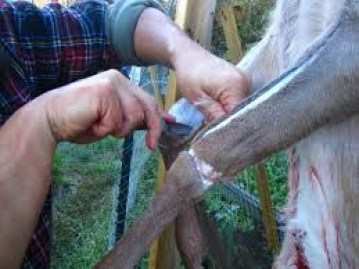
Next, you’ll to go down to the front knee. Cut the joints and the tendon that are keeping the hoof attached to the bottom.
Once you cut through those you are in a position to break the hoof off. You can do this with a knife or use a Sawzall. Whatever you feel most comfortable with, but I will say if you use a Sawzall it is important to remember to only use it to cut through the bone. If you use it to cut through the hair, it’ll get caught up in your blade which makes for a mess.
But when we do this, we just use our knife and remove the hooves. So it is all about personal preference. People butcher deer differently everywhere you go so there is no true right way of doing this.
5. Pull the Skin Loose
After you’ve detached the hoof on that side of the deer, you’ll need to use your knife to get back under the skin of the deer. You’ll start this process back to where you just cut the leg off. You’ll need to run the rounded edge of the blade all the way from the elbow to the shoulder.
Now, this should leave loose skin. So you’ll need to pull it off of the meat and then you’ll have a front quarter.
6. Rinse and Repeat
Once you’ve cut the front shoulder on one side loose, you just repeat the same steps for the other shoulder.
7. Start Cutting at the Pelvic Area
After your front shoulders are removed, you will need to begin cutting at the pelvic area. If your deer was not field dressed, then cutting across the pelvis will expose all of the deer’s innards. I usually put a large wheel barrel under the deer so it can catch everything that falls out.
Then it also makes it easier to move the deer’s innards in order to dispose of it. After the innards are removed, you’ll need to cut out the tenderloins. This can be found on the inside of the backstrap.
Related: HOW TO FIELD DRESS AND PROCESS DEER MEAT FOR STORAGE
8. Work on the Tail
RELATED : MEAT POTTING: AN ALMOST FORGOTTEN SKILL WORTH REDISCOVERING
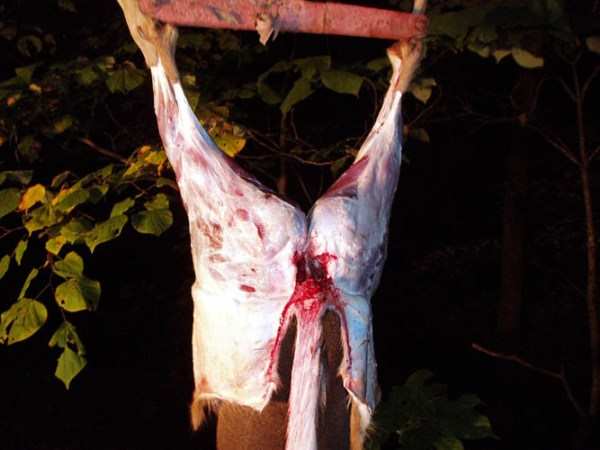
After you’ve removed the tenderloins, you will work away at removing the skin for the back half of the deer the same way you did for the front quarters.
However, things change a little bit when you get to the tail of the deer. You’ll filet the skin off separating the skin from the meat completely down the legs and the rectum of the deer.
Then you’ll peel the whole deer skin down to the tail. Work your knife down to one joint in the tail bone. Once you’ve cut through the tail, you can then use the tail as a handle and pull the skin off of the deer all at once.
9. Work on the Back Strap
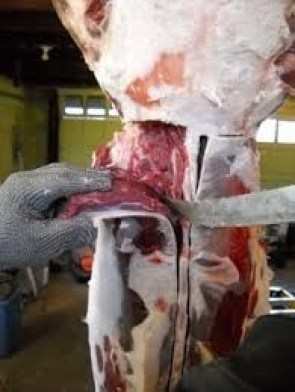
After you’ve got all of the skin off of the deer you still have more meat to cut off. So you’ll run your knife along both sides of the spine. Then you’ll need to use your knife like a spoon and start spooning the meat off of the spine of the deer. These will be your back straps.
10. Cut off the Roast
The last part of the deer that will be left is the roasts. You can remove them by either finding the hip joint and placing your knife in the joint to get it to release.
Or you can use a Sawzall to remove the roasts from the deer as well. Again, this is all about preference. Once you get the hang of it, you might want to use a knife.
But if you are first starting out, I wouldn’t get too frustrated. Therefore, I’d probably recommend going with the Sawzall if you are a beginner because then you don’t have to worry about finding the joint.
11. Let the Meat Rest
RELATED : A RETURN TO THE OLD PATHS: HOW TO MAKE PEMMICAN LIKE THE NATIVE AMERICANS
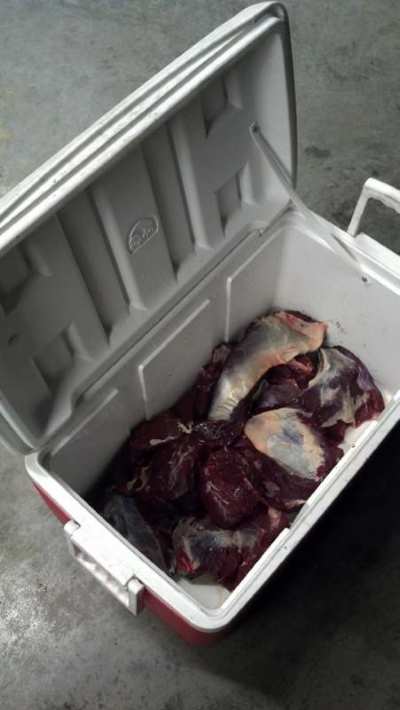
Every piece of meat you cut off of the deer needs to go in the cooler. You’ll do this throughout the butchering process.
After you get all of the meat into the cooler, you’ll need to pour the five-pound bag of ice over the meat. Then let the meat rest. We usually let our meat sit for 7-10 days.
However, I have to warn you, you need to keep plenty of ice on the meat. You don’t want it to get over 40 degrees Fahrenheit. The whole idea of allowing meat to rest is to let the blood drain out of the meat.
So be sure to open the stopper in the cooler and to place it on a hill so the blood will run downward and out of the cooler.
After you see that most of the blood has been drawn out of the meat, then you are ready to take inside to process it.
12. Dispose of the Guts and Skin
In between closing the cooler and putting all of your materials away, you will have to dispose of the guts of the deer.
But you need to do so safely. If you have livestock near your home, you could potentially draw predators.
So be sure to either dig a hole and bury the innards, or you could use them as feed for our livestock. Pigs will eat the bones clean on the deer carcass. I feed the guts to our chickens since they seem to enjoy them. Deer parts also make great dog treats.
Here is a resource to help you figure out how to dispose of deer guts. Some trash facilities will allow you to dispose of it that way. Ideally, you would be able to leave the remains out in an open field because animals will usually take care of it for you.
But I need to say, do NOT throw your deer carcass out on the side of the road. It is irresponsible and looks really bad on hunters. So please dispose of the deer carcass responsibly. As a last resort, you can pay for a processing facility to get rid of the carcass for you.
13. Process the Meat
RELATED : OLD SCHOOL WILD GAME SMOKED VENISON SAUSAGE RECIPES
Processing the meat is always the daunting job for me. You can always take it somewhere and pay someone to do it for you.
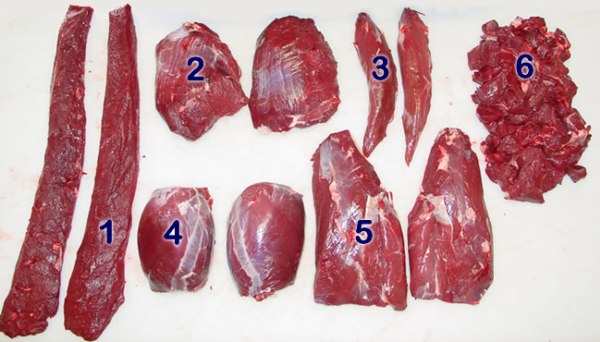
However, we prefer to do it ourselves. Often we will save the back straps and cut them into steak which is an easy way to process the meat. You just slice them and place them in a vacuum sealed freezer bag.
Also, you can use any scrap meat to make deer burger. Deer also makes a wonderful breakfast sausage. We also make cube steaks, roasts, and loins out of cuts of meat from the deer.
So you see, anyway that you would normally use beef, you can use deer as well. It just takes a little more deer to make up the recipe than beef.
But it is also free meat. Don’t forget you can also make deer tips from roasts as well. I usually can them so they are ready for a quick meal when I need one.
If you do decide to process your own deer, I recommend watching this video to get a better idea of how to do it. Also, you’ll need a cuber for cube steak, a meat grinder for sausage and hamburger, and most likely a vacuum sealer as well. Don’t forget a sharp knife too!
Here is a video to walk you through the whole process of butchering a deer visually. It sounds like a lot but once you do it a few times you’ll get the hang of it.
Don’t let the work stop you from trying this. Butchering and processing is a big job, but so worth it. Deer makes up our red meat for the year. It is healthier for my family and it also saves us a ton of money in the process.
But I’d love to hear your thoughts on the matter. Do you do anything differently when skinning a deer? What is your favorite way to process it? Do you have a favorite cut of meat? If so, what’s your favorite way to prepare it?
We love hearing from you all so please leave your comments below.
Source : morningchores.com
Would you like to know how the first settlers field dressed their meat and how they preserved it?
Here’s just a glimpse of what you’ll find inside Carnivores’s Bible:
You’ll discover the ancient meat preservation method that will make your mouth water. Enjoying the delicious sweet-smoky taste of beef, pork, or link sausages for months to come… without ANY refrigeration, chemicals, preservatives, or additives!
And you can prepare everything in your back-yard (or balcony) in one afternoon– I promise it will be more relaxing than taking the day off to go fishing.
You’ll also learn how to get rid of the toxic canned food from the supermarket… and preserve your own healthy & delicious vegetables and fruits. All you need is Rick’s secret canning trick to instantly kill bacteria and parasites…
… and eliminate ANY toxic preservatives so you can keep your food in perfect condition for a full year, with all nutrients and vitamins intact.
You can get your copy HERE
CHECK OUR survival and prepping solutions
If you found this article useful, please like our Facebook page and stay up to date with the latest articles.
WHAT TO READ NEXT:
5 TECHNIQUES TO PRESERVE MEAT IN THE WILD YOU SHOULD PRACTICE
HOW TO MAKE YOUR OWN BACON (STEP BY STEP GUIDE)
A RETURN TO THE OLD PATHS: HOW TO MAKE PEMMICAN LIKE THE NATIVE AMERICANS
20 LOST RECIPES FROM THE PIONEERS: WHAT THEY COOKED ON THEIR JOURNEY WESTWARD
SEVEN CLASSIC GREAT DEPRESSION ERA RECIPES GRANDMA USED TO MAKE
POTTED MEAT: A LOST SKILL OF LONG TERM MEAT STORAGE
BACK TO BASICS: HOW TO MAKE AND PRESERVE LARD
THE BEST WAY TO STOCKPILE VEGETABLES OFF-GRID
OLD FASHIONED PRESERVING-GRANDPA’S RECIPE FOR CURED SMOKED HAM
HOW TO MAKE GUNPOWDER THE OLD FASHIONED WAY
SURVIVAL HERBAL RECIPES FROM OUR ANCESTORS
HOW TO PRESERVE MEAT FOR SURVIVAL LIKE OUR GRANDFATHERS
OTHER USEFUL RESOURCES:
The 3 Pioneer Survival Lessons We Should Learn
The Most Effective Home Defense Strategies
Old School Hacks for Off-Grid Living
The Medical Emergency Crash Course
The Smart, Easy Way to Food Independence
How to Survive the Coming 100 Years Long Drought

One Reply to “13 Easy Steps on How to Butcher a Deer and Get the Perfect Venison”