
If you’re like me, if you see something you like, you wonder how to make them instead of just buying it from somebody else. This is how many of my friends have gotten into home canning – they’ve tasted something that I’ve made (I regularly give away my jellies, jams, and salsas as gifts) and then they want to learn how to make it.
When I tell them, I also teach them how to avoid several common home canning mistakes, and now I’d like to share them with you.
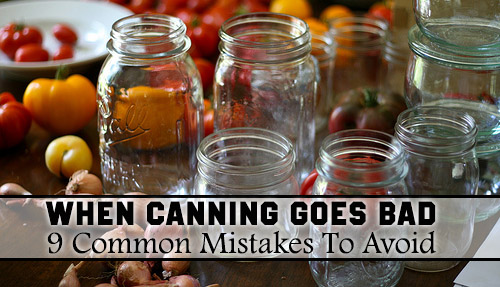
Whether you’re making peach preserves or entire meals in a jar, don’t make the following mistakes!
Not Wiping the Rims
This is one of those rookie mistakes that a person only makes large-scale once. It’s common even for an experienced canner to have a jar or two not seal, especially when canning greasy foods like meat or sauces.
Having just one or two not seal is fine; you just throw it in the fridge and eat it soon. Losing a whole batch, or at least several jars, is a disaster. It’s a waste of food, time, and money and is terribly discouraging.
But you can avoid it. My approach to canning is that you can’t be too careful with any step. It’s a precise process, sort of like baking. You need to complete each step properly if you want a successful end product.
In that vein, I wipe all of my rims with a clean, damp cloth, then go back and wipe them with a dry cloth just to make sure.
Not Sterilizing the Jars
While it’s true that the food inside the jars boils, you run the risk of locking pathogens in the jar if you don’t sterilize them first. Trust me – if there was a way to skip this step, I would. But there’s not. As a matter of fact, you can’t skip any of the steps in this article – that’s why I’m emphasizing them.
All you need to do is scrub them well in hot, soapy water and rinse them well. Now you know that there are no pathogens and there are no traces of oils or any remnants of food left from whatever you used the jar for last.
Even if it’s new, you still need to wash it. I’d venture to say, especially if it’s new!

Over-filling or Under-filling the Jars
It’s important that you leave enough room – called head room – in a jar to allow for expansion and boiling, but it’s also important that you fill it enough that the jar will seal properly. If you have a lot of air left in the jar, it may be tough to get the jar to seal or stay sealed. Usually a half-inch is about right.
Your recipe will tell you exactly how much space to leave, so follow that. If you have a little left over, instead of using a jar, throw it in the fridge.
Not Processing Correctly
If you don’t take anything else away from this article, this is the one to hold on to. Non-acidic foods such as meat, some fruits and most vegetables MUST be pressure-canned. Unless of course you fancy a raging case of botulism, which attacks your neurological system and kills you and stuff. Personally, I’ll use the pressure canner.
Seriously, though, the reason that this is necessary is because botulism is anaerobic, meaning that it thrives in low-oxygen environments. It doesn’t do well in an acidic environment, but when you get a low-acid, low-oxygen environment, you’ve basically built it a beach house and rolled out the welcome mat.
Each recipe will call for a different time and pressure, so it depends on what you’re making and what type of machine you have. Don’t let this intimidate you; I know a lot of people that don’t use pressure canners or pressure cookers because they’re scared of them. Follow the directions and you’ll be fine. Plus, you can cook a roast in a pressure cooker in forty-five minutes or so. Bonus!
Signs that your canned goods are contaminated with botulism are bubbles at the top (after it’s been sitting for a few weeks or months), a popping sound when you open it, a leaky lid, and a slimy white film on the food. If you have any of these, don’t risk it – toss it. A jar of green beans is not worth dying for.
Not Releasing the Air Pockets
You need to use a spatula or wooden spoon to release the air pockets in the jar so that it will seal properly. There’s actually a tool designed specifically for this if you want to buy it. You want all of the air out of the jar for a couple of reasons – first, it seals better when there’s very little air. Second, botulism that we talked about above.
Once you fill your jars, run the spatula or spoon down the sides of the inside of the jar and just wiggle it around a little so that all of the air pockets release. Do this right before you wipe your rims so that you can add more water or sauce if you need to.
Putting Cold Jars in Boiling Water, or Vice Versa
Canning jars are known for their durability, but be careful mixing temperatures. Even the best glass can only take so much. You need to be especially careful going from hot to cold. Never put a hot jar in cold water.
As a matter of fact, when you take it from the canner, handle it carefully because there’s still quite a bit of pressure in there. I’ve pretty much blown up a jar a time of two because I knocked it on the edge of the counter pulling it out of the bath. You want them to cool slowly, too, so cover them with a towel when you take them out of the bath. That’s not a requirement, but I’ve found that my stuff seals a little better if I set them on a towel, then put another towel over them.
Using Damaged or Non-Canning Jars
It’s perfectly fine to reuse Ball or Mason (or whatever) jars that are made specifically for home canning, but using commercial jars like pickle jars that aren’t meant for home canning aren’t acceptable. Now that you have the right jars, check them for cracks and run your fingers along the rim looking for chips. If there’s even the smallest one, don’t can with it.
Re-Using Lids
I know a few people who re-use their rubber-sealed lids and to be honest I’ve done it myself when I was in a pinch and was one shy of having enough. But don’t. Seriously. There’s no way to make sure that they’re free of bacteria and the rubber is only made for one use so there’s no way to guarantee that it will seal. If you have a thing about throwing stuff out like I do, keep it to use on jars that aren’t going to be used for canning.
There are now reusable canning lids available though. They appeal to my sensibilities and in the long run are cheaper than single-use lids.
Using Over-Ripe Fruit
You want your produce to be ripe, but if it’s too ripe, it’ll cook to mush. On the other side of the coin, if it’s not ripe enough, the flavors won’t be fully developed. There are different guidelines for every fruit and vegetable, but in general, you don’t want it to be so ripe that it’s soft. At that point, it’s either time to eat it or turn it into jelly or sauce.
Canning is a pleasurable, satisfying end to all of your hard work, as long as it works out well. It’s a relatively easy process as long as you follow the basic guidelines and avoid the home-canning mistakes made above.
And the most important thing is that you’ll be able to make your own food for long term survival, so you won’t rely on what you may or may not find on the shelves!
I know that there are all kinds of mistakes that you’ve made if you’ve canned much, so please share your experiences with us in the comments section below.
This article has been written by Theresa Crouse for Survivopedia.
Theresa Crouse is the author of the best seller ” Forgotten Lessons of Yesterday”
You can get your copy of the book HERE
Would you like to know how the first settlers preserved their food?
Then you really need this amazing book. It is called The Lost Ways and it contains all the knowledge of our forefathers.
 Here’s just a glimpse of what you’ll find in The Lost Ways:
From Ruff Simons, an old west history expert and former deputy, you’ll learn the techniques and methods used by the wise sheriffs from the frontiers to defend an entire village despite being outnumbered and outgunned by gangs of robbers and bandits, and how you can use their wisdom to defend your home against looters when you’ll be surrounded.
Native American ERIK BAINBRIDGE – who took part in the reconstruction of the native village of Kule Loklo in California, will show you how Native Americans build the subterranean roundhouse, an underground house that today will serve you as a storm shelter, a perfectly camouflaged hideout, or a bunker. It can easily shelter three to four families, so how will you feel if, when all hell breaks loose, you’ll be able to call all your loved ones and offer them guidance and shelter? Besides that, the subterranean roundhouse makes an awesome root cellar where you can keep all your food and water reserves year-round.
From Shannon Azares you’ll learn how sailors from the XVII century preserved water in their ships for months on end, even years and how you can use this method to preserve clean water for your family cost-free.
Mike Searson – who is a Firearm and Old West history expert – will show you what to do when there is no more ammo to be had, how people who wandered the West managed to hunt eight deer with six bullets, and why their supply of ammo never ran out. Remember the panic buying in the first half of 2013? That was nothing compared to what’s going to precede the collapse.
From Susan Morrow, an ex-science teacher and chemist, you’ll master “The Art of Poultice.” She says, “If you really explore the ingredients from which our forefathers made poultices, you’ll be totally surprised by the similarities with modern medicines.” Well…how would you feel in a crisis to be the only one from the group knowledgeable about this lost skill? When there are no more antibiotics, people will turn to you to save their ill children’s lives.
And believe it or not, this is not all…
Table Of Contents:
Making Your Own Beverages: Beer to Stronger Stuff
Ginger Beer: Making Soda the Old Fashioned Way
How North American Indians and Early Pioneers Made Pemmican
Spycraft: Military Correspondence During The 1700’s to 1900’s
Wild West Guns for SHTF and a Guide to Rolling Your Own Ammo
How Our Forefathers Built Their Sawmills, Grain Mills,and Stamping Mills
How Our Ancestors Made Herbal Poultice to Heal Their Wounds
What Our Ancestors Were Foraging For? or How to Wildcraft Your Table
How Our Ancestors Navigated Without Using a GPS System
How Our Forefathers Made Knives
How Our Forefathers Made Snow shoes for Survival
How North California Native Americans Built Their Semi-subterranean Roundhouses
Our Ancestors’Guide to Root Cellars
Good Old Fashioned Cooking on an Open Flame
Learning from Our Ancestors How to Preserve Water
Learning from Our Ancestors How to Take Care of Our Hygiene When There Isn’t Anything to Buy
How and Why I Prefer to Make Soap with Modern Ingredients
Temporarily Installing a Wood-Burning Stove during Emergencies
Making Traditional and Survival Bark Bread…….
Trapping in Winter for Beaver and Muskrat Just like Our Forefathers Did
How to Make a Smokehouse and Smoke Fish
Survival Lessons From The Donner Party
Get your paperback copy HERE
WHAT TO READ NEXT:
5 TECHNIQUES TO PRESERVE MEAT IN THE WILD YOU SHOULD PRACTICE
HOW TO MAKE YOUR OWN BACON (STEP BY STEP GUIDE)
A RETURN TO THE OLD PATHS: HOW TO MAKE PEMMICAN LIKE THE NATIVE AMERICANS
20 LOST RECIPES FROM THE PIONEERS: WHAT THEY COOKED ON THEIR JOURNEY WESTWARD
SEVEN CLASSIC GREAT DEPRESSION ERA RECIPES GRANDMA USED TO MAKE
POTTED MEAT: A LOST SKILL OF LONG TERM MEAT STORAGE
BACK TO BASICS: HOW TO MAKE AND PRESERVE LARD
THE BEST WAY TO STOCKPILE VEGETABLES OFF-GRID
OLD FASHIONED PRESERVING-GRANDPA’S RECIPE FOR CURED SMOKED HAM
HOW TO MAKE GUNPOWDER THE OLD FASHIONED WAY
SURVIVAL HERBAL RECIPES FROM OUR ANCESTORS
HOW TO PRESERVE MEAT FOR SURVIVAL LIKE OUR GRANDFATHERS
OTHER USEFUL RESOURCES:
The 3 Pioneer Survival Lessons We Should Learn
The Most Effective Home Defense Strategies
Old School Hacks for Off-Grid Living
The Medical Emergency Crash Course