
Can you imagine dying from a cut on your finger or a scrape on your knee? How about a respiratory infection or a toothache? Before the invention of penicillin, the first antibiotic, that could have been your cause of death. If SHTF, access to antibiotics may become limited or impossible. If that happens, it’s important to know how to make antibiotics at home.
To understand the importance of antibiotics, think of it in larger terms. They would have cured the bubonic plague, which was a bacterial infection that took 100 million lives in the 14th century. It was originally caused by infected rats and the fleas that had bitten them, and then bitten a person. Since it was highly contagious, after a person was infected by the rat or flea, the infection then spread from them to other people.
This is the Best Natural Painkiller, and Grows in Your Backyard!
Antibiotics also cure tuberculosis, a highly contagious bacterial disease that still exists today. As a matter of fact, in 2014 alone, more than 9 million people were reported to have it.
All bacterial infections are contagious to some degree, though for some, such as ones that cause an infected tooth or cut, the risk of infection is low because it’s mostly blood born. With other infections, such as tuberculosis, all you have to do is breathe the same air to become infected.
Though we think of the plague as something long behind us, we’re only protected from it because of access to antibiotics. If society collapses, pandemics like it could wreak the same havoc on humanity as they did then.
For thousands of years, Chinese medicine has used fungi to treat skin infections. World-wide, a common treatment for any skin lesion was a poultice made of dirt, which likely contained fungi. For thousands of years, people may not have known WHY something worked; they just knew that it did. Fortunately, we don’t have to depend on such blind faith anymore, so let’s get on with it.
Related: THE BEST NATURAL PAINKILLER THAT GROWS IN YOUR BACKYARD (SIMILAR TO MORPHINE)
Making penicillin at home is difficult, but possible if you have the right equipment and ingredients. First things 100-101 first, though: don’t do it unless it’s truly a survival situation.
First, commercial antibiotics have been made by the pros, and they’re a known quantity. Second, making drugs at home, whether they’re legal or illegal, is frowned upon, and distributing them is illegal in most places.
How to Make Penicillin
This is a no-brainer, right? It’s made from bread mold, so you just leave a loaf out, cook up the mold or something, then take it, yes? Umm, no. Penicillin is made from the penicillium fungus found on foods such as some breads and fruits (a moldy cantaloupe played a huge role in initial experiments), but here’s the thing – the bacteria JN0-102 has to be stressed.
So, you have to grow the fungus, then introduce it to stressors before you can use it to make penicillin.
Very important heads up – your culture has to be grown and cultivated in a sterile environment or else other bugs and nasties will contaminate it and cause a Frankin-culture instead of the pure penicillium culture that you need to make antibiotics.
There’s a simple but less reliable way of making penicillin, and then there are steps that you can take to ensure that your end result is penicillin. Warning: though: it’s complicated and requires chemicals that can be quite expensive and have limited shelf lives.
Equipment needed:
- A gram scale
- Separatory funnel
- A 1-liter glass container
- 750 ml Erlenmeyer flask with a non-absorbent plug
- A pH test kit
- 2 pieces of whole wheat bread
- A cantaloupe rind, more bread, or citrus fruit
Step 1 – Set out the rind, bread or fruit and let it mold (we’ll call this the host). It will go through a few phases. First the mold will be white or gray, then it will turn blue, then a bright blue-green. This is the color you want. Note: if you choose to use bread, it’s best to make it yourself because many bakeries use an ingredient that inhibits mold growth.
Step 2 – Sterilize the flask by putting it in the pressure cooker at 15 lb. for at least 15 minutes, or bake it at 315 degrees F for an hour.
Step 3 – Cut the whole wheat bread (see note in step 1) into 1/2-inch cubes and place them in the flask, careful to be as sterile as you can.
Step 4 – scrape the blue-green mold from the host and place it in with the bread. Again, be as sterile with this step as you can, for instance, boil the tongs that you’re using.
Step 5 – Place the flask in a dark place that’s around 70 degrees and allow it to incubate for 5 days.
At this point, some people may say that you’re done and you can just slap the “penicillin” on the wound or make tea or soup from the bread. We don’t recommend it.
Step 6 – Now it’s going to get complicated. You’re going to need the following ingredients:
- Lactose Monohydrate 44 gm
- Corn Starch 25 gm
- Sodium Nitrate 3 gm
- Magnesium Sulfate 0.25 gm
- Potassium Monophosphate 0.50 gm
- Glucose Monohydrate 2.75 gm
- Zinc Sulfate 0.044 gm
- Manganese Sulfate 0.044 gm
Now, according to the instructions that I found (neither of which were actual medical sites because, as usual, there aren’t any actual medical sites that describe how to make anything like this at home), it says to dissolve these in tap water.
Related: 6 POTENT NATURAL PAIN RELIEVERS FOR PREPPERS
After researching, it seems that distilled water would be the best to use for the next step because we want to keep things as sterile as possible and tap water has unknown variables. That’s just my opinion and I’m definitely not a formally trained scientist, so use what you prefer.
Step 7 – So, back to it. Sterilize the 1+ liter container, then dissolve the above ingredients in 500 ml of cold water. Add more cold water to make it a full liter.
Step 8 – Use hydrochloric acid (HCL) to adjust the pH to 5.0-5.5 using your pH test kit.
Step 9 – Sterilize the container along with the solution as described above.
Step 10 – Allow the solution to cool, then add the mold. Incubate it for another 7 days under the same conditions as before. It’s important that the fluid isn’t jostled around so put it where it won’t be moved.
If you’ve done it correctly, you’re almost done. Now it’s time to extract the penicillin that’s infused in the fluid.
Step 11 – Filter the mix through a coffee filter or sterilized cheesecloth.
Step 12 – Adjust the pH of the solution to 2.2 using the HCL and the pH test kit.
Step 13 – Mix with cold ethyl acetate in the separatory funnel and shake vigorously for 30 seconds or so then allow it to separate. The ethyl acetate will be at the bottom.
Step 14 – Chill a beaker in an ice bath and drain the ethyl acetate into it. Add 1 percent potassium acetate and mix it again.
Step 15 – Let the ethyl acetate evaporate off while the solution is still in the beaker. You want plenty of air circulating through.
Step 16 – You have penicillin, assuming you did everything right. Actually the crystals that remain are potassium penicillin and potassium acetate.
This is a pretty scientific process and not something that you should undertake lightly, just to save yourself a few bucks on a prescription.
Because there are so many variables, making your own penicillin is tricky at best. Yes, you may have penicillin but you may have some bad bugs in there, too. But if SHTF, you’re dying from septicemia and you have no other viable options, then it’s not like this is going to make anything worse.
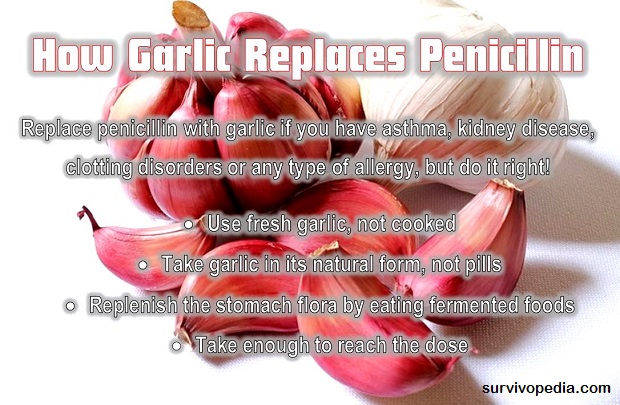
There are also many other sources of natural antibiotics that you can eat or even use topically, including honey, garlic, oil of oregano, and ginger. Honey is also a great preventive because in addition to killing something that may have gotten into the wound, it also acts as a barrier to keep other bugs out.
If you opt to use this recipe, it may be best to test it on a patch of your skin first to see if you have a reaction then go from there.
Try other natural recipes to treat you illnesses , as nature will always provide the best medicine one can have!
This article has been written by Theresa Crouse for Survivopedia.
WHAT TO READ NEXT:
How To Make Pemmican, The Ultimate Survival Food (Video Tutorial)
5 TECHNIQUES TO PRESERVE MEAT IN THE WILD YOU SHOULD PRACTICE
HOW TO MAKE YOUR OWN BACON (STEP BY STEP GUIDE)
A RETURN TO THE OLD PATHS: HOW TO MAKE PEMMICAN LIKE THE NATIVE AMERICANS
20 LOST RECIPES FROM THE PIONEERS: WHAT THEY COOKED ON THEIR JOURNEY WESTWARD
SEVEN CLASSIC GREAT DEPRESSION ERA RECIPES GRANDMA USED TO MAKE
POTTED MEAT: A LOST SKILL OF LONG TERM MEAT STORAGE
BACK TO BASICS: HOW TO MAKE AND PRESERVE LARD
THE BEST WAY TO STOCKPILE VEGETABLES OFF-GRID
OLD FASHIONED PRESERVING-GRANDPA’S RECIPE FOR CURED SMOKED HAM
HOW TO MAKE GUNPOWDER THE OLD FASHIONED WAY
SURVIVAL HERBAL RECIPES FROM OUR ANCESTORS
HOW TO PRESERVE MEAT FOR SURVIVAL LIKE OUR GRANDFATHERS
OTHER USEFUL RESOURCES:
The 3 Pioneer Survival Lessons We Should Learn
The Most Effective Home Defense Strategies
Old School Hacks for Off-Grid Living
The Medical Emergency Crash Course